Breakthrough: Battle of the Lys River Bridgehead
Campaign Objective
The main objective was a small footbridge over the Lys River at the village of Erquinghem. In reality this was held by a detachment from a pioneer battalion, the 18th Royal Northumberland Fusiliers. I've been wanting to set a campaign around this unit for years, having picked up a rare copy of their regimental history in Alnwick a few years back.
How did it work?
Each turn, the Germans made a series of moves across a ten mile front. They would then select one to be the 'main effort', which we wargamed using Line of Battle. The remainder were determined by dice rolls. This meant we could regulate the pace of the campaign, knowing there was only ever one battle per turn to fight. It also allowed us to blend strategic, operational and tactical planning - this meant some members of our group who couldn't make the tabletop game could still take part by giving orders by email. This was a system we perfected in our Russo Japanese War Supercampaign with the worthy Paul giving orders from the other side of the world.
Campaign Summary and Finale
Check out the high tech video of our campaign admin slides! This gives you a quick overview of how it all went, in four-hour chunks.
The Germans achieved pretty much every one of their objectives on time. With overwhelming artillery support, and the ability to concentrate at a point of their choosing, they broke through the front line in under an hour. The Brits had a secret plan to withdraw steadily while constructing a rear defence line, trading space for time and avoiding the worst of the German artillery. To use a boxing analogy, we stepped back while their powerful opening punch hit thin air.
But it didn't quite work like that - it took most of the morning before the defence lines even started to take shape and the Brits could retreat safely. In the meantime both sides took a beating, but the Germans paid for their ground with some horrific casualties.
At the end of the first day the lines were complete and the British disengaged and slipped back about a mile overnight. Once the Germans realised what was happening, they rapidly advanced (taking Armentieres) and launched straight into an attack on the defence line. The first assault was beaten back with heavy losses, and for a time it looked as though the attack had stalled, but a second effort sent the British forces tumbling back over the river in disarray. By 8.30am on the second day, the vital bridges were in German hands.
You can look at two of the previous battles using the links:
The Final Battle
 |
| Looking east from behind the hastily-dug British defence line. The rubber TimeCast trenches were a fantastic addition to the tabletop. |
 |
| Some hardy northerners manning a stretch of trench. |
 |
| What an action shot! The Germans managed to sneak up close during the night, giving them only a small amount of ground to cover. They started from the small town at the crossroads of the white tracks. |
 |
| Pretty soon a veritable wave of stormtroopers came rushing out of the village. One bunker was quickly knocked out with mortar fire, but enfilade fire from a second almost checked the attack. |
 |
| At the very top of the board, the Germans show their hand when the main attack is launched. All those red dice near Mike's hand are British casualties... |
 |
| Despite the initial attack being repelled, soon the Germans are over the trenches and it's all over. |
 |
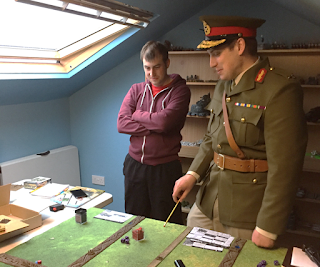
| Don't remember that picture... |
As I say, an interesting campaign because it was hard to tell who won. It closely mirrored real life - the bridge fell only about an hour and a half later than it did in real life, and the Germans achieved a total tactical victory, although at the cost of some very heavy casualties.
I hope you enjoyed that brief summary. We thoroughly enjoyed the campaign; it was taken much slower than our other intensive games, with a turn a month being the average pace. There's more to come in the next few weeks on the blog, including (gasp) some Warhammer 40K!
All the best,
Ed


French wine? Anyway, beautiful trenches and a great looking game!
ReplyDeleteThe spoils of war...? Sounds like a plausible excuse! Thanks for reading Phil, I'm glad you enjoyed it.
DeleteGreat campaign report. Small scale figures and large scale battles are always good in my book.
ReplyDeleteCheers,
Pete.
Pleased to find another who appreciates the joy of small scale gaming, just for the sheer visual impact.
DeleteThose poor Tommies. Like Pete says, this looks to be the perfect scale for action of this size. Though it looks as though the stress of British command got to you in that last pic? ;)
ReplyDeleteLooking forward to the 40K!
Thanks Dai. I think this sort of operational level wargaming is something that's not really done for 20th Century warfare. Flames of War approaches that level (though it is still fundamentally tactical), which is why I like it for all its faults. Ha yes, it was a very long night!
Delete