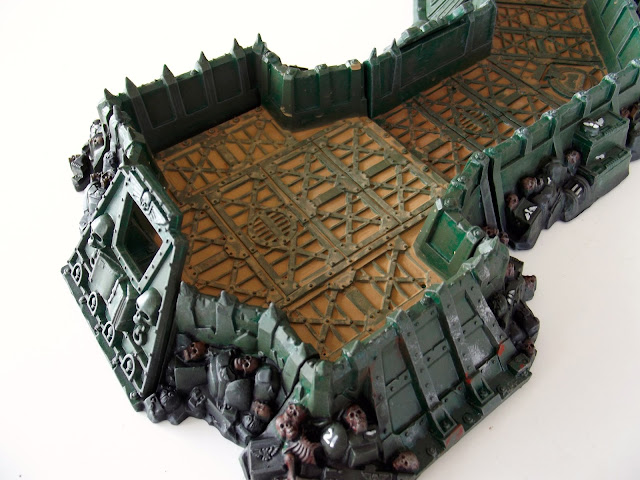
Imperial Fortifications
Pretty pictures today folks, here we have some of GW's Martyr's Defence Lines, which I've recently painted up for a mate. Which is a shame, since I really like them and now I'll probably have to give them back. For those uninitiated, this is the combination of a set which includes trenches, dugouts and a command post and it's all totally modular. A very nice set, if a little on the expensive side, but sure to dominate any battlefield. Enough waffle, time for pictures!
 |
| The muddy grating was done with a mix of weathering powder and water. |
 |
| My first ever attempt at Object Source Lighting there - and it doesn't look like it was a catastrophe. Hurrah! |
Thanks for reading,
Ed


It's damn nice work Ed maybe your mate will forget you have it?
ReplyDeleteFingers crossed! Actually we'll probably end up fighting each other with it on the board so I'll still get to see it :)
DeleteVery nice! I really dig the color combo and the rust/mud effect looks fantastic - great work, man!
ReplyDeleteCheers, glad you liked. Weathering powders for the win...
DeleteNice.
ReplyDeleteI can't believe I just wrote that about what appears to be a defensive warfighting position built on the very bodies of the previous defenders. Oh well, such is the nature of the Grimdark.
Haha, never thought of it like that.
DeleteExcellent work sir, as ever! We need to another terrain building day asap...
It actually gets stronger each time it's overrun, since the decaying bodies of the defenders offer extra protection against incoming fire. Grimdark.
DeleteI really like the floors and walls - can you tell us more about the technique that you used? (so I can copy it)
ReplyDeleteWell done Colonel. Thanks for sharing it with us.
I sure can - the main green bits were sprayed Dark Angels Green, then drybrushed Catachan green and a very light drybrush of Codex Grey to finish.
DeleteFor the mud, mix about a teaspoon of weathering powder (I used the sand coloured one from the FW set) with about an eggcup full of water. Mix it all together, then simply pour it on the floor! Spread out with a brush, and add a little more water if it doesn't quite cover. It needs about a day to properly dry.
Awesome, thanks!
DeleteWhen you say sprayed you mean airbrushing? Or do you spray from a base coat can? I haven't yet ventured into spraying, my Kauvnian 56th Heavy is all hand painted. I'm seriously looking into spraying for the ease of base painting and then just highlighting and detailing with a brush.
DeleteHi Jordan, yes, spraying as opposed to airbrushing. I find spraying much quicker, cheaper and simpler than airbrushing and if it's for basecoating you don't notice the slight difference in quality at all.
DeleteMan, I would HATE to have to paint something like this - but it really does look amazing! Nice work.
ReplyDeleteReally? I loved it, but maybe that's because I don't paint terrain very often. I can see myself getting bored if I had to do much more of this...
DeleteHave seen one of these in person and I like everything about the sculpt aside from all the silly dead Cadians littering all over the place. MORE skulls GW??? seriously? *le sigh*
ReplyDeleteVery nice job with the colours though mate. Would love to see it on a gaming table.
I'll try and get a battle on with it soon for you. Yeah from a purely painting perspective the detail is nice to paint on, brings it together. But it is very OTT.
DeleteAwesome work, I love the model myself, and I have to say I love your colour choices. Mine is green with grey buttresses. :)
ReplyDeleteI found it a pretty decent piece to paint (only halfway through now) as it is mostly a drybrush job with just enough details to stop it being plain.
Now I've picked up the Apoc Wall of Martyrs pieces aswell, all in all pretty epic terrain on a table.
Thanks Drake! Yes have to say by the end I had a decent 'system' and was smashing out each section in a few minutes.
DeleteSounds like a suitably epic terrain set! No pun intended...