Today we continue the Tale of Two Armies - an in-depth look at collecting a
2mm army. We covered
organising, basing and
painting small-scale armies - now it's time to look at basing them.
In 2mm, basing is
key. A nice base always brings a model together, but at this scale, the base is pretty much all you'll see on the tabletop. Painting is just about giving the impression of a block of troops, but the base is what most people will actually be looking at.
The key is not to go overboard - a tree at 2mm might be 5mm tall, say, but you're not going to put a tree on every base. I go for a generic green flock, with a scattering of fine gravel and sand to break it up a bit, then some foliage for bushes and small trees. Anything more than that starts to look a bit over the top.
 |
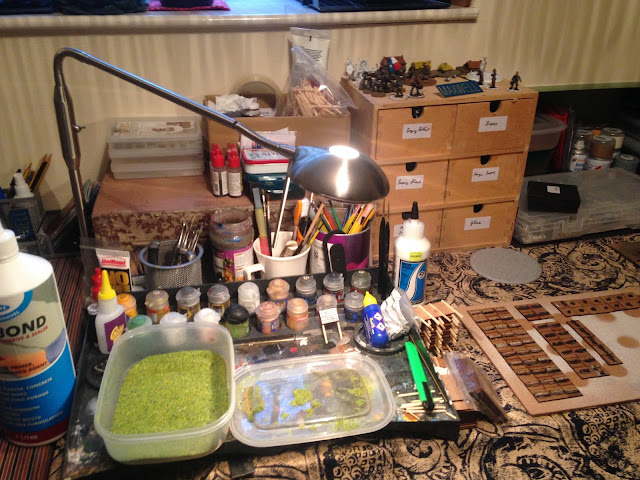
| The War Room is ready. Models are set out ready for basing, I have an area for scattering flock, with PVA on standby. I find an old knife, a sculpting tool and even a few matchsticks are invaluable for spreading out the PVA. |
 |
| These chaps have been PVAd and are ready for the grass. I try to put a lot of PVA on, then the flock can soak in and make a really solid mix that will last. It also helps build up the base a bit - the 2mm models still have their own base, and this brings the level of the grass up to their feet, rather than around the edge of the base they were cast on. |
 |
| Let it snow! |
 |
| Ready for drying. I leave at least 24 hours, ideally a couple of days - as I mentioned above, this helps the PVA to fully dry. Since it's quite thick, it has to dry in layers which allows the flock to soak in. |
 |
| Once they've dried and had the excess flock messily blown off, I add small dots of tree foliage. This is a personal touch; not everyone likes to do it, but I think it makes the bases a little more interesting and gives them some individuality. |
That concludes the main parts of this short series on 2mm collecting - as I say, nothing there that people couldn't guess, but I thought I'd lift the lid on the mysterious world of 2mm wargaming. I also thought it would be nice to share the process I go through and see how/where I do my modelling, since those are the sorts of posts I always find most interesting on other peoples' blogs.
We'll be using these Austrians to refight the 1756 Battle of Lobositz later on this year, so look out for that!
All the best,
Ed


Great tutorial. The mass effect is certainly there.
ReplyDeleteCheers,
Pete.
Thanks Pete! Nothing too complicated, but it's just the sort of thing you don't see often on the blog - the 'bread and butter' of modelling.
DeleteYes, it certainly comes together when it's all on the table in amongst all the terrain.
Like Pete says, seeing them all blocked together I think really shows your methods off the best. The random tree/bushes also make them look more natural.
ReplyDeleteYour desk is a bit tidy Ed... Just saying.
That was a bit of an accident at first, I spilled a box of those bushes onto a flocked model and thought it looked okay.
DeleteThis is a bit unfair, it's just after a clean-up. Normally I go for a Dinah's Kitchen approach of 'it's messy, but I know where everything is'.
I really like this series. Your figures look great, fine tutorial. Thanks for sharing!
ReplyDeleteThanks mate, glad you enjoyed it! Perhaps not glamorous, but a very necessary part of modelling.
Delete