Tutorial: WWI German Infantry
Still working away on WWI stuff with a view to getting enough forces to play Trench Raiders, my own skirmish wargame. The Russians are done and dusted - see them in all their khaki glory here.
So I'm painting some German infantry up now, and it wouldn't be fair to teach everybody to paint Russians without doing Germans, would it? These chaps make heavy use of the tecniques discussed in the Army Painter review. So here we go. Hang on to your stahlhelms...
Until next time...
Ed
So I'm painting some German infantry up now, and it wouldn't be fair to teach everybody to paint Russians without doing Germans, would it? These chaps make heavy use of the tecniques discussed in the Army Painter review. So here we go. Hang on to your stahlhelms...
 |
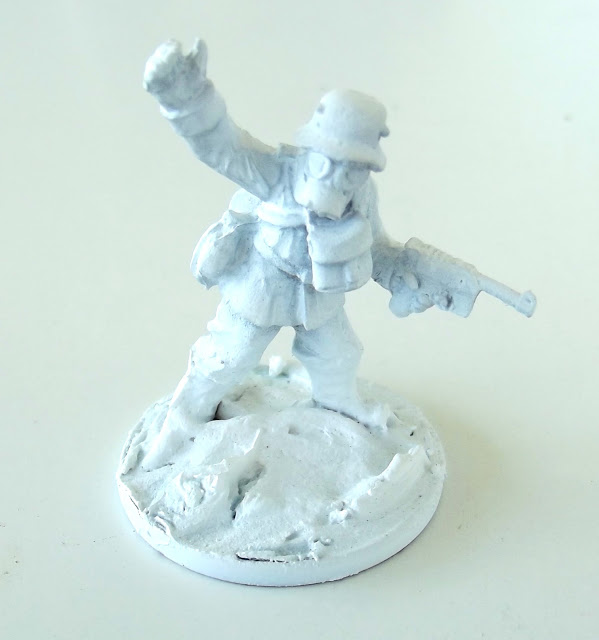
| This is the based model, complete with a generic white undercoat. |
 |
| The tunic areas are painted field grey - I used GW's absurdly-named Skavenblight Dinge. |
 |
| The boots, pistol, gasmask and other metal details are painted black. I also did the helmet black, as it's going to have a camouflage pattern. |
 |
| Secondary Colours: Dark Flesh for leather and webbing areas, Catachan Green for the water bottle, and Talharn Flesh for the hands. |
 |
| All the above stages are pretty ragged, since now we even it all out with a generous Dark Tone Wash out the Army Painter range - or alternatively any good black ink. |
 |
| The tunic is highlighted with more Skavenblight Dinge and the Dark Flesh with Bestial Brown. |
 |
| Hands are highlighted Elf Flesh |
 |
| Detailing - red trim on the tunic for an infantry regiment, white eppaulettes with a single gold pip for an Oberleutnant, and a little metal drybrush on the Mauser 'Broomhandle' pistol. The Osprey book on the First World War German Army was my reference. |
 |
| Detail of the schulterstück ... |
 |
| ... and the C96 and cuffs. (Note to fellow pedants: this is a late-war officer, so I omitted the officer's tunic and cuff decorations to represent him using a private's tunic). |
Hope everybody found that useful; I'm trying to build up a little section of historical tutorials on the First World War stuff. Next time, a little more discussion on the rules I think.
Until next time...
Ed


Wow, that red trim is so fine....
ReplyDeleteVery nice tutorial sir.
Well thankyou kindly Mr Dai... It's helped by the fact the cuff is sculpted on, so that's not entirely painted, you just have to run your brush along the raised edge.
ReplyDelete