Anti-Magnetic Tank Paint
Earlier I posted a few pictures of my tanks, some of which have been fitted with 'Zimmerit' anti-magnetic paint, and as I did another one today I remembered to take some photos so I could do a mini-tutorial. First, a bit of a history lesson: zimmerit was the name for the composition the Germans applied to a few of their tanks during World War 2, which was a mix of sawdust, wood glue and a few other chemicals. It wasn't strictly 'anti-magnetic' at all, it just created an uneven surface so that mines couldn't be stuck to it. It was only used for about a year. Despite the fact that it worked well, the Allies didn't use nearly as many magnetic AT mines as the Germans did so it was barely worth the effort. Also, a popular and totally untrue rumour that it was flammable started spreading, and in Sept 1944 the practice was stopped.
The 40K precedent and inspiration for this comes from two sources. WD296, which has an old Armoured Company list (p. 79), gives 'Anti-mag' as a 10pt upgrade which gives a 4+ save against the effects of stick bombs, melt bombs, krak grenades &c. I noted this with interest, but since I never intended to do an armoured company, I forgot about it. Until playing Dawn of War: Dawn of Steel recently, when some Orks blew up my lovely new Vanquisher with said stick bombs. I thought it would be nice if they had something to protect themselves against these annoying bombs, and lo, the Idea was born.
I got my tank squadron configuration from Dawn of War as well; 1 Vanquisher to sit back and smash the tanks, and a pair of Demolishers with flamers to roll forward and smash enemy heavy infantry. So I decided to apply it to my Demolishers, thinking they would bear the brunt of any grenades etc. On with the tutorial!
This is a fairly straightforward operation. You'll need:

 1. Spread a generous amount of filler on a tile or piece of card, and using the knife spread it onto the tank. Although historically they wouldn't just do the sides as I have, I thought that doing the whole thing would look a bit over the top, and obscure a lot of the detail so I just did the side plates. Also easier and quicker this way.
 2. Using the expensive cutlery, press the flat edge of the knife on the side of the tank and scrape away the excess, leaving a flat (ish) surface to work with. You should be able to see the most raised parts of the plastic; you can see the outline of the hatchway just below the sponson turret here.
 3. Using a scalpel, score lots of horizontal lines a few millimetres apart. Again, this is on a much bigger scale to the real thing (these lines varied but were usually about 5-10cm apart) but if you did it at the real scale, you'd never be able to tell what it was from a distance on the board so it's magnified.
 4. The fiddly bit. Go along the horizontal lines and score tiny vertical lines, as close together as you can. It works better if you can find something to press in to make the mark, rather than simply scoring with a knife, since you tend to obscure the detail with the 'furrow' either side when you score such a small line. I have an old modelling knife with the tip snapped off, which makes a flat head about 3mm along, which is perfect but you can improvise here. The picture shows it half done. Despite how tedious it looks I did this in about three minutes.
 5. There you have it! Once it's dry, very lightly rub over it with a tissue paper so any odd bits that are sticking out can be taken off. What I will say is that this is pretty fragile, even with a liberal application of varnish, so an extra hand-painted undercoat to 'seal' it before painting might be a good idea.
And there you have it! Your tanks can roll forward, guns blazing with impunity (and bullets) and melt bombs bouncing off your armour. Provided you can make the 4+ save. After all this effort, it would be a shame if you just rolled a two, wouldn't it? Until next time ...
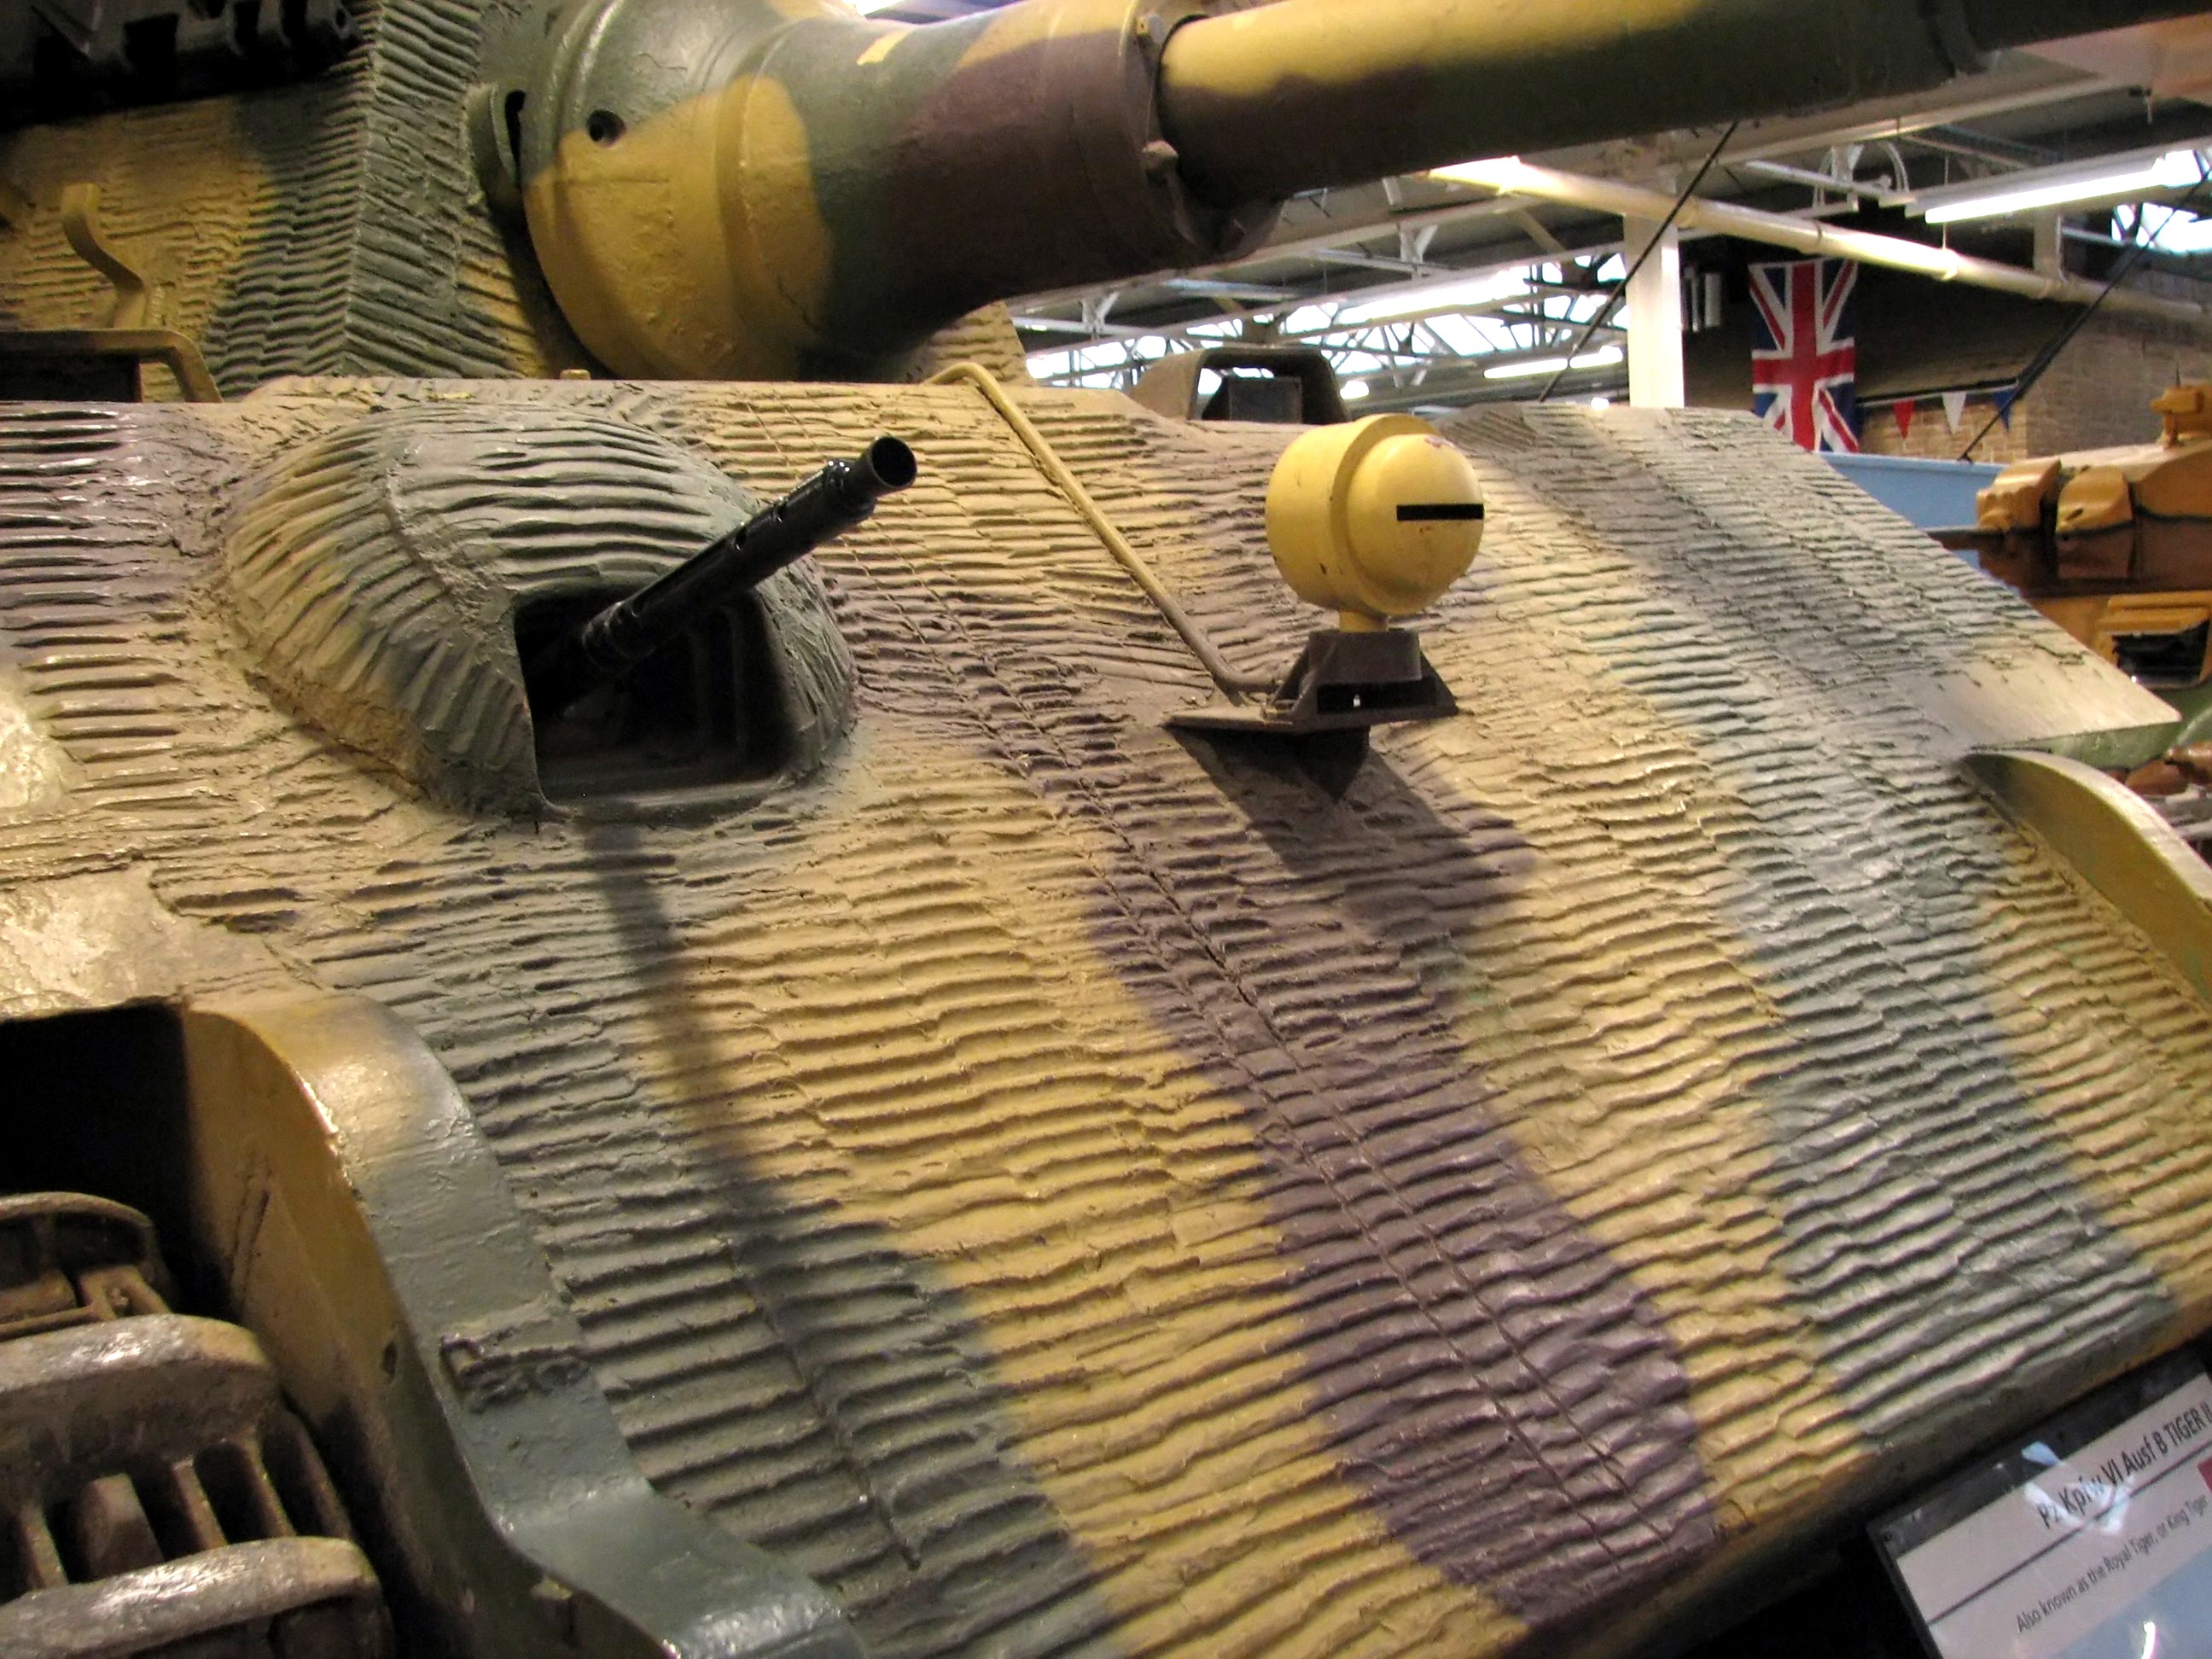 |
| German Tiger II (King Tiger) with Zimmerit paint applied. |
I got my tank squadron configuration from Dawn of War as well; 1 Vanquisher to sit back and smash the tanks, and a pair of Demolishers with flamers to roll forward and smash enemy heavy infantry. So I decided to apply it to my Demolishers, thinking they would bear the brunt of any grenades etc. On with the tutorial!
This is a fairly straightforward operation. You'll need:

- The tank
- Polyfilla: any will work, but I find Polycell stuff is the best as it doesn't dry out in the tube unlike others
- An old knife
- Scalpel/modelling knife
- The Sting, with Robert Redford and Paul Newman (optional)
- A healthy disregard for using dinner table/cutlery for modelling (not optional)


And there you have it! Your tanks can roll forward, guns blazing with impunity (and bullets) and melt bombs bouncing off your armour. Provided you can make the 4+ save. After all this effort, it would be a shame if you just rolled a two, wouldn't it? Until next time ...


Cracking stuff - you need to make yourself some sort of stamp to save time - saying that, I know it only took three minutes to do the smaall detail - how long take it take in total?
ReplyDeleteNot longer than 10 minutes, but that's after doing a few of them. A stamp would make it a lot quicker though ...
ReplyDeleteHow about an old Lego Technic wheel or something like that with the right patterned tread that you could roll across the surface, not entirely ideal and may only save negligable time...
ReplyDelete